> ## Documentation Index
> Fetch the complete documentation index at: https://aci.dev/docs/llms.txt
> Use this file to discover all available pages before exploring further.
# Quickstart
> Power Your First AI Agent with ACI.dev
This guide walk you through building an AI agent with function calling capability with ACI.dev
# Sign up to the Platform
* [platform.aci.dev ](https://platform.aci.dev) .
* We'll create a default `project` and default `agent` for you when you first log in to the platform.
# Configure Your First App for Your AI Agent to Use
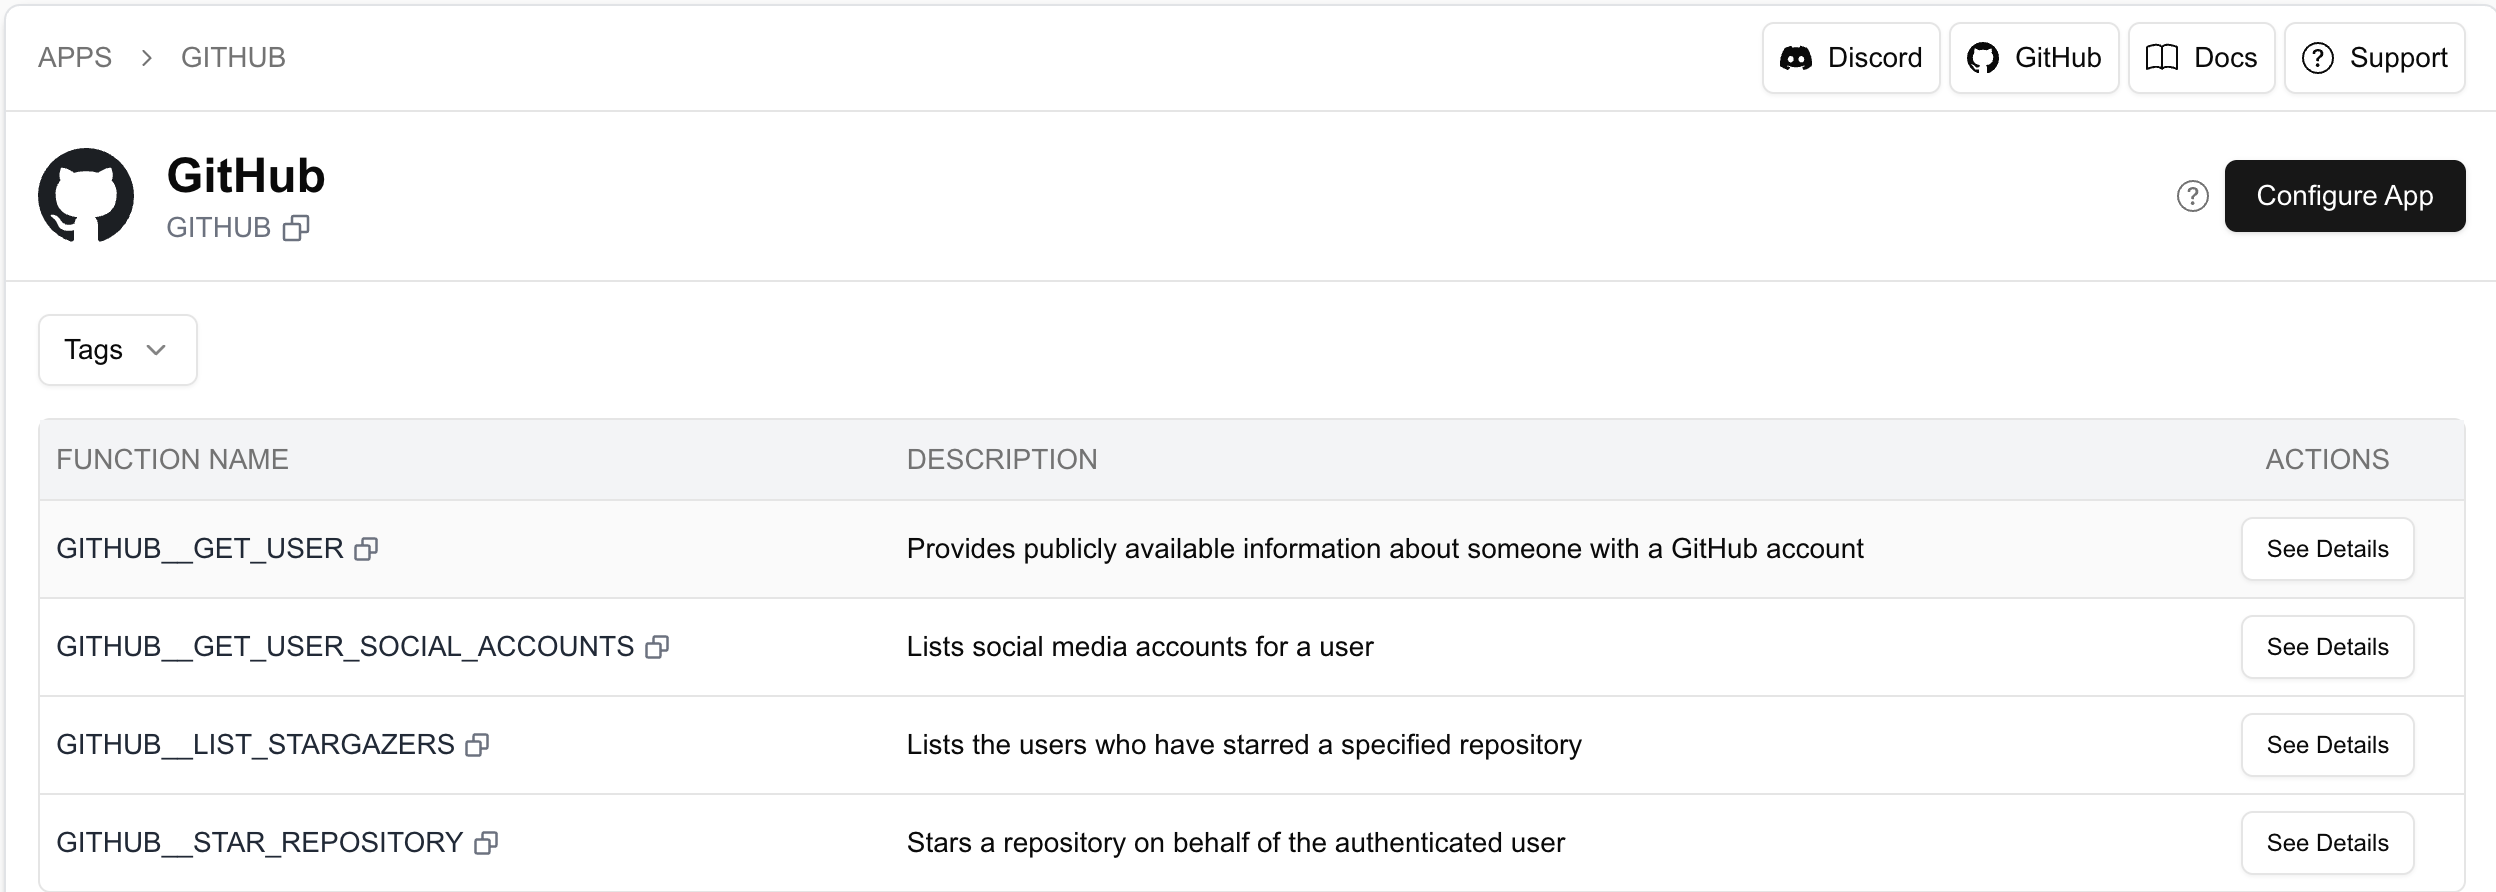
Navigate to `App Store` and find [GITHUB ](https://platform.aci.dev/apps/GITHUB).
Then click on `Configure App` button to set up the app for your project.
 * Navigate to `App Configurations` and find [GITHUB App Configuration ](https://platform.aci.dev/appconfig/GITHUB). Then click on `Add Account` button to link your Github account.
`linked account owner id` is the ID of the owner of the linked account. It's up to you to decide which ID to use—it can be the unique end-user ID from your system. Or If you're building an agent for yourself, you can choose any name you prefer. Later, you'll need to provide this `linked account owner id` in your code to execute functions on behalf of the user.
* Navigate to `App Configurations` and find [GITHUB App Configuration ](https://platform.aci.dev/appconfig/GITHUB). Then click on `Add Account` button to link your Github account.
`linked account owner id` is the ID of the owner of the linked account. It's up to you to decide which ID to use—it can be the unique end-user ID from your system. Or If you're building an agent for yourself, you can choose any name you prefer. Later, you'll need to provide this `linked account owner id` in your code to execute functions on behalf of the user.
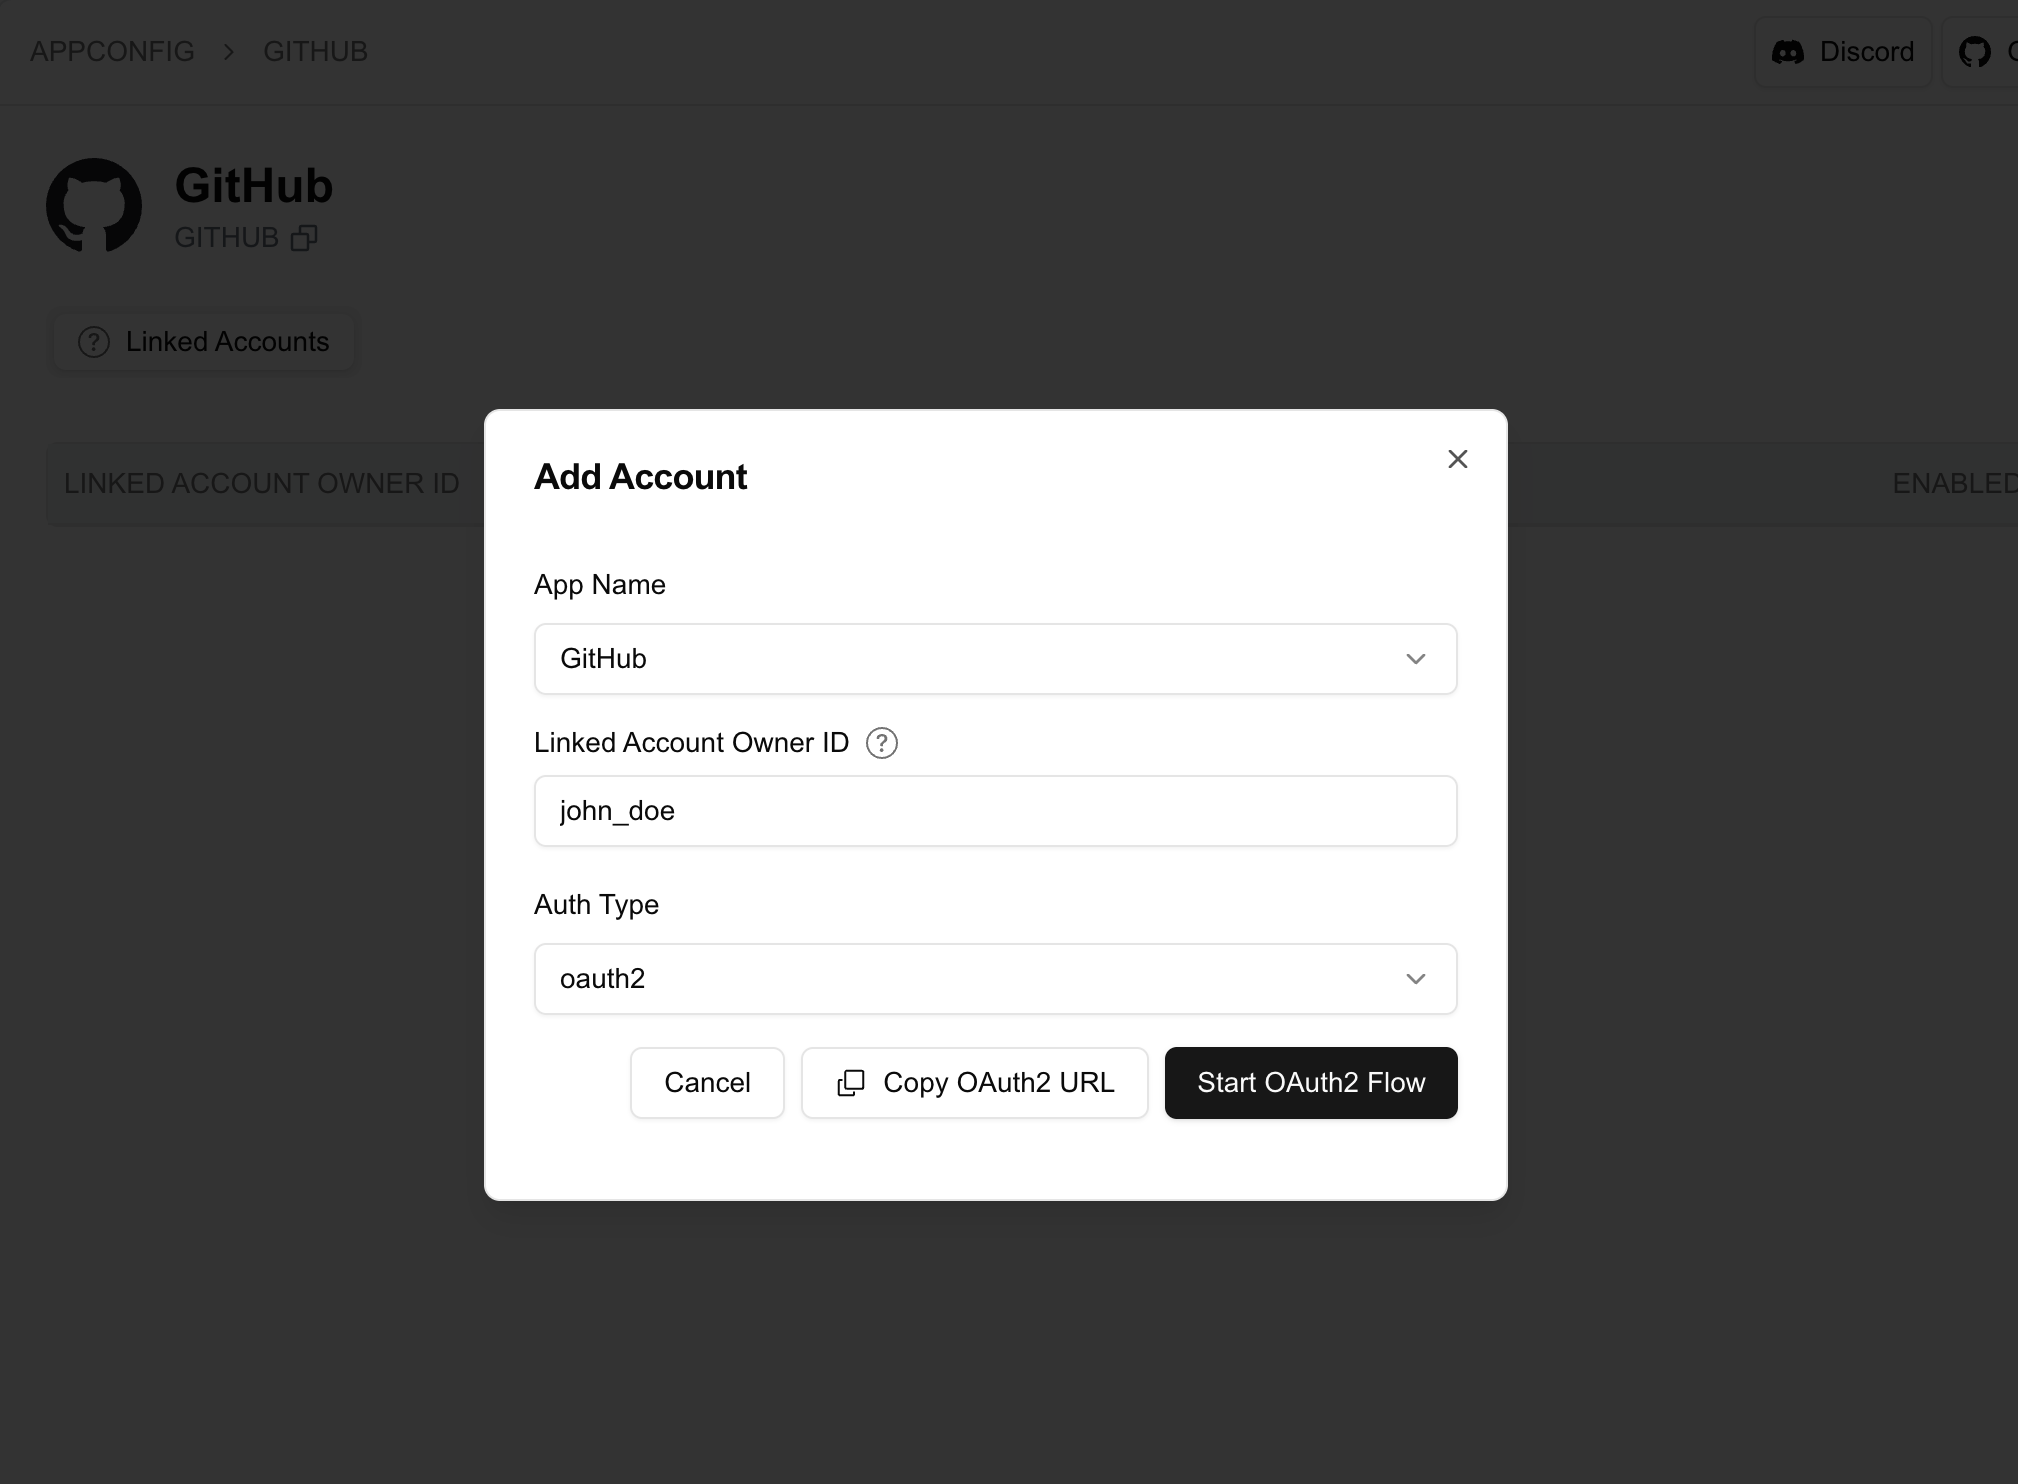 * Click `Start OAuth2 Flow` button to start the OAuth2 flow and link your Github account under the project.
* We took an opinionated approach to acommodate a multi-agent architecture. You can create multiple agents within the project, and each agent has its own API key and apps that they are allowed to use.
* We created a default agent for you when you first log in to the platform.
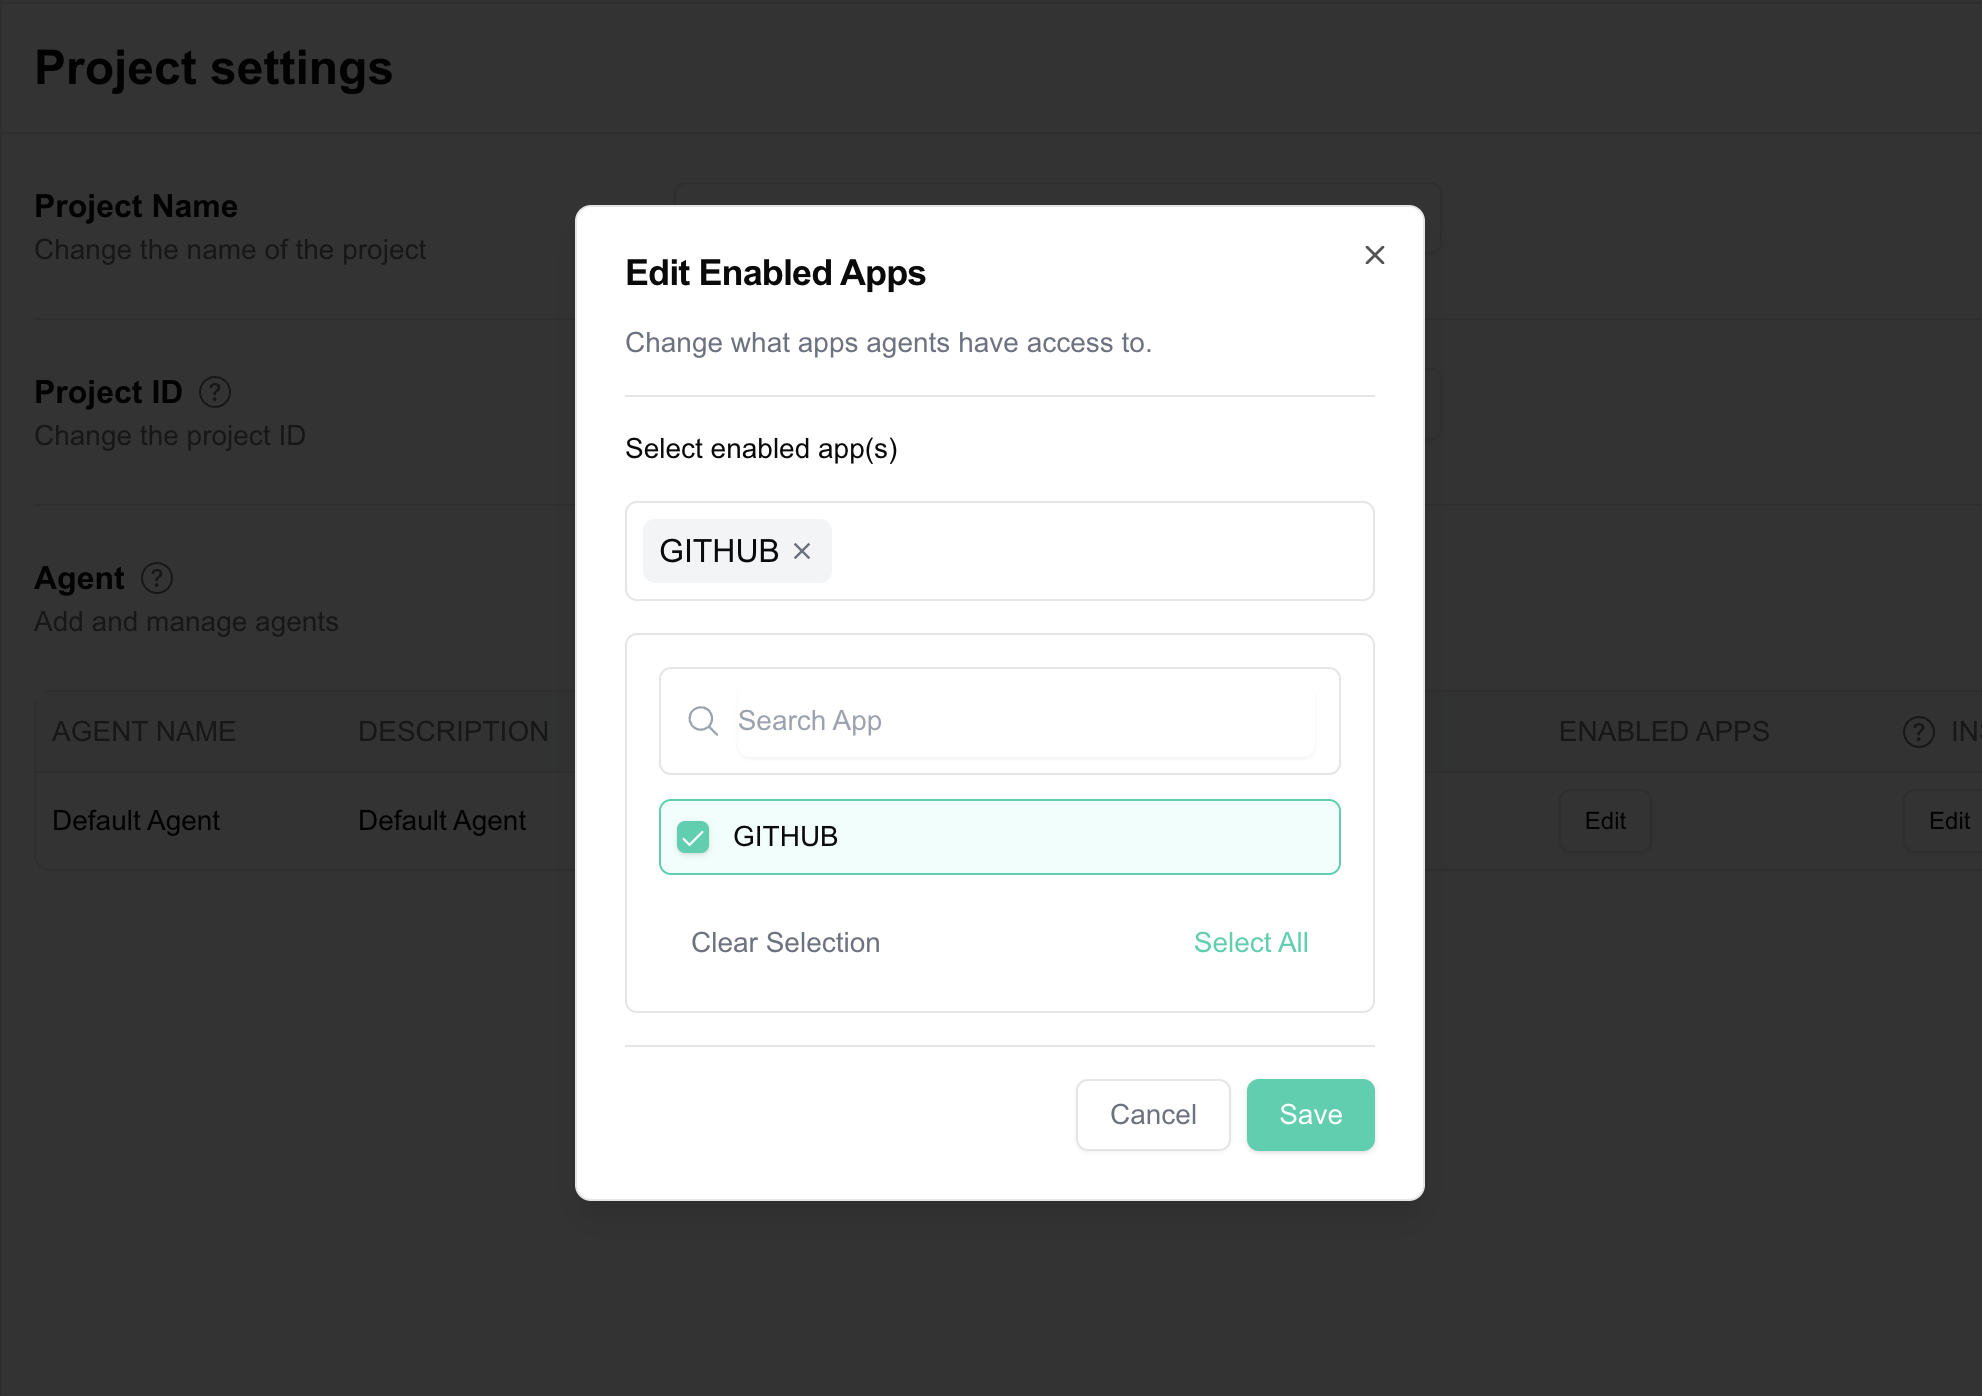
Navigate to the project setting page: [Manage Project ](https://platform.aci.dev/project-setting). Then click the `Edit` button under `ALLOWED APPS` column of the agent to allow access to the `GITHUB` app.
* Click `Start OAuth2 Flow` button to start the OAuth2 flow and link your Github account under the project.
* We took an opinionated approach to acommodate a multi-agent architecture. You can create multiple agents within the project, and each agent has its own API key and apps that they are allowed to use.
* We created a default agent for you when you first log in to the platform.
Navigate to the project setting page: [Manage Project ](https://platform.aci.dev/project-setting). Then click the `Edit` button under `ALLOWED APPS` column of the agent to allow access to the `GITHUB` app.
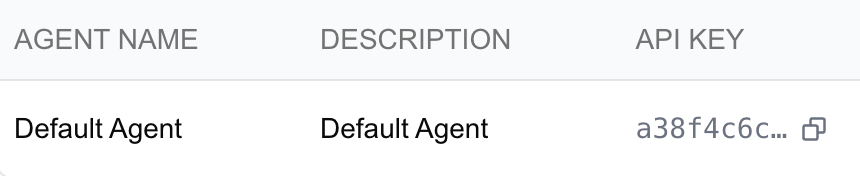
 Each `Agent` is assigned an API key, which you can use to send requests to our platform—either via raw HTTP requests or our SDK. Later, you'll need to include this API key in your code.
 # Code Example
The ACI Python SDK requires Python 3.10+.
The example below uses `uv` for package installation, but you can use `pip` or any other package manager of your choice.
The full example code is available at the end of this guide.
```bash bash theme={null}
uv init
```
* Install the ACI Python SDK
```bash bash theme={null}
uv add aci-sdk
```
* To run the example, you'll also need to install other required packages.
```bash bash theme={null}
uv add openai python-dotenv
```
You'll need both the ACI API key and the OpenAI API key to run the example in this section. Create a .env file in the root of your project and add the following:
```bash .env theme={null}
ACI_API_KEY=your_aci_api_key
OPENAI_API_KEY=your_openai_api_key
```
```python python 3.10+ theme={null}
from dotenv import load_dotenv
from aci import ACI
from openai import OpenAI
load_dotenv()
aci = ACI()
openai = OpenAI()
```
```python python 3.10+ theme={null}
github_star_repo_function = aci.functions.get_definition("GITHUB__STAR_REPOSITORY")
```
```python python 3.10+ theme={null}
response = openai.chat.completions.create(
model="gpt-4o-2024-08-06",
messages=[
{
"role": "system",
"content": "You are a helpful assistant with access to a variety of tools.",
},
{
"role": "user",
"content": "Star the aipotheosis-labs/aci githubrepository for me",
},
],
tools=[github_star_repo_function],
tool_choice="required", # force the model to generate a tool call for demo purposes
)
```
Replace `` with the `linked account owner id` you used when linking your Github account.
```python python 3.10+ {11} theme={null}
tool_call = (
response.choices[0].message.tool_calls[0]
if response.choices[0].message.tool_calls
else None
)
if tool_call:
result = aci.handle_function_call(
tool_call.function.name,
json.loads(tool_call.function.arguments),
linked_account_owner_id=
)
```
Here is the complete runnable code for the example above, you can copy and paste it into a file and run it.
* Remember to provide api keys in the `.env` file.
* Replace `` with the `linked account owner id` you used when linking your Github account.
```python python 3.10+ {42} theme={null}
import json
from dotenv import load_dotenv
from openai import OpenAI
from aci import ACI
load_dotenv()
openai = OpenAI()
aci = ACI()
def main() -> None:
# For a list of all supported apps and functions, please go to the platform.aci.dev
print("Getting function definition for GITHUB__STAR_REPOSITORY")
github_star_repo_function = aci.functions.get_definition("GITHUB__STAR_REPOSITORY")
print("Sending request to OpenAI")
response = openai.chat.completions.create(
model="gpt-4o-2024-08-06",
messages=[
{
"role": "system",
"content": "You are a helpful assistant with access to a variety of tools.",
},
{
"role": "user",
"content": "Star the aipotheosis-labs/aci github repository for me",
},
],
tools=[github_star_repo_function],
tool_choice="required", # force the model to generate a tool call for demo purposes
)
tool_call = (
response.choices[0].message.tool_calls[0]
if response.choices[0].message.tool_calls
else None
)
if tool_call:
print("Handling function call")
result = aci.handle_function_call(
tool_call.function.name,
json.loads(tool_call.function.arguments),
linked_account_owner_id=,
)
print(result)
if __name__ == "__main__":
main()
```
# Advanced Usage
For more advanced usage, please refer to the examples in our [ACI Agents Repository ](https://github.com/aipotheosis-labs/aci-agents/tree/main).
# Code Example
The ACI Python SDK requires Python 3.10+.
The example below uses `uv` for package installation, but you can use `pip` or any other package manager of your choice.
The full example code is available at the end of this guide.
```bash bash theme={null}
uv init
```
* Install the ACI Python SDK
```bash bash theme={null}
uv add aci-sdk
```
* To run the example, you'll also need to install other required packages.
```bash bash theme={null}
uv add openai python-dotenv
```
You'll need both the ACI API key and the OpenAI API key to run the example in this section. Create a .env file in the root of your project and add the following:
```bash .env theme={null}
ACI_API_KEY=your_aci_api_key
OPENAI_API_KEY=your_openai_api_key
```
```python python 3.10+ theme={null}
from dotenv import load_dotenv
from aci import ACI
from openai import OpenAI
load_dotenv()
aci = ACI()
openai = OpenAI()
```
```python python 3.10+ theme={null}
github_star_repo_function = aci.functions.get_definition("GITHUB__STAR_REPOSITORY")
```
```python python 3.10+ theme={null}
response = openai.chat.completions.create(
model="gpt-4o-2024-08-06",
messages=[
{
"role": "system",
"content": "You are a helpful assistant with access to a variety of tools.",
},
{
"role": "user",
"content": "Star the aipotheosis-labs/aci githubrepository for me",
},
],
tools=[github_star_repo_function],
tool_choice="required", # force the model to generate a tool call for demo purposes
)
```
Replace `` with the `linked account owner id` you used when linking your Github account.
```python python 3.10+ {11} theme={null}
tool_call = (
response.choices[0].message.tool_calls[0]
if response.choices[0].message.tool_calls
else None
)
if tool_call:
result = aci.handle_function_call(
tool_call.function.name,
json.loads(tool_call.function.arguments),
linked_account_owner_id=
)
```
Here is the complete runnable code for the example above, you can copy and paste it into a file and run it.
* Remember to provide api keys in the `.env` file.
* Replace `` with the `linked account owner id` you used when linking your Github account.
```python python 3.10+ {42} theme={null}
import json
from dotenv import load_dotenv
from openai import OpenAI
from aci import ACI
load_dotenv()
openai = OpenAI()
aci = ACI()
def main() -> None:
# For a list of all supported apps and functions, please go to the platform.aci.dev
print("Getting function definition for GITHUB__STAR_REPOSITORY")
github_star_repo_function = aci.functions.get_definition("GITHUB__STAR_REPOSITORY")
print("Sending request to OpenAI")
response = openai.chat.completions.create(
model="gpt-4o-2024-08-06",
messages=[
{
"role": "system",
"content": "You are a helpful assistant with access to a variety of tools.",
},
{
"role": "user",
"content": "Star the aipotheosis-labs/aci github repository for me",
},
],
tools=[github_star_repo_function],
tool_choice="required", # force the model to generate a tool call for demo purposes
)
tool_call = (
response.choices[0].message.tool_calls[0]
if response.choices[0].message.tool_calls
else None
)
if tool_call:
print("Handling function call")
result = aci.handle_function_call(
tool_call.function.name,
json.loads(tool_call.function.arguments),
linked_account_owner_id=,
)
print(result)
if __name__ == "__main__":
main()
```
# Advanced Usage
For more advanced usage, please refer to the examples in our [ACI Agents Repository ](https://github.com/aipotheosis-labs/aci-agents/tree/main).